Factorial Implementations — Tutorial

Factorial Implementations — Advanced Tutorial

Two ready-to-build C++ examples included in this folder: a simple recursive example using native types and an iterative big-integer example using a digit vector.

Files

  • recursive_simple.cpp — Recursive version using unsigned long long. Short and didactic; overflows for n > 20.
  • bigint_iterative.cpp — Iterative big-integer version using a vector of base-10 digits. Computes exact factorials for much larger n without external libraries.
  • factorial_comparison.md — Comparison notes and guidance for publication.

How to build

GCC / Clang

g++ -std=c++17 -O2 recursive_simple.cpp -o recursive_simple
./recursive_simple

g++ -std=c++17 -O2 bigint_iterative.cpp -o bigint_iterative
./bigint_iterative

MSVC (Developer Command Prompt)

cl /EHsc recursive_simple.cpp
recursive_simple.exe

cl /EHsc bigint_iterative.cpp
bigint_iterative.exe
Note: If you open the Visual Studio solution included in this folder, ensure only one file with main() is built per project, or keep these examples in separate projects to avoid multiple-definition linker errors.

Quick comparison

  • Recursive (native): minimal code; limited by 64-bit overflow and recursion depth.
  • Big-int (digit vector): exact results for large n; simple implementation but not optimized for thousands of digits — prefer boost::multiprecision::cpp_int or GMP for production.

Suggested tutorial flow

  1. Introduce factorial mathematically.
  2. Show recursive native implementation and explain overflow and stack-depth limits.
  3. Show iterative native implementation and discuss limits.
  4. Present big-integer approach (this repo) and explain complexity.
  5. Demonstrate using boost::multiprecision::cpp_int and compare performance.
  6. Optional: link to advanced algorithms (prime-swing, binary splitting) for very large factorials.

Ready to publish. If you want, I can also generate an HTML page that embeds full source code blocks, or produce a single combined ZIP containing both examples and the tutorial HTML.

Conexão Limitada Windows 8.1

Conexão Nula ou Limitada Windows 8.1

Este tutorial é para usuários que atualizaram do Windows 8 para Windows 8.1 e após não conseguem mais acesso à conexão Wifi no mesmo roteador que já acessavam à Internet normalmente. E caso tentem conectar em outra conexão Wifi, irão conectar sem problemas!

Obs: Se você está tendo problemas para acessar à Internet como foi descrito acima, então nem perca tempo tentando outras alternativas, como comandos pelo prompt de comando(CMD) nem alterando propriedades da conexão TCP/IP, etc…

Só precisa alterar as configurações de conexão wireless no roteador para b/g/n

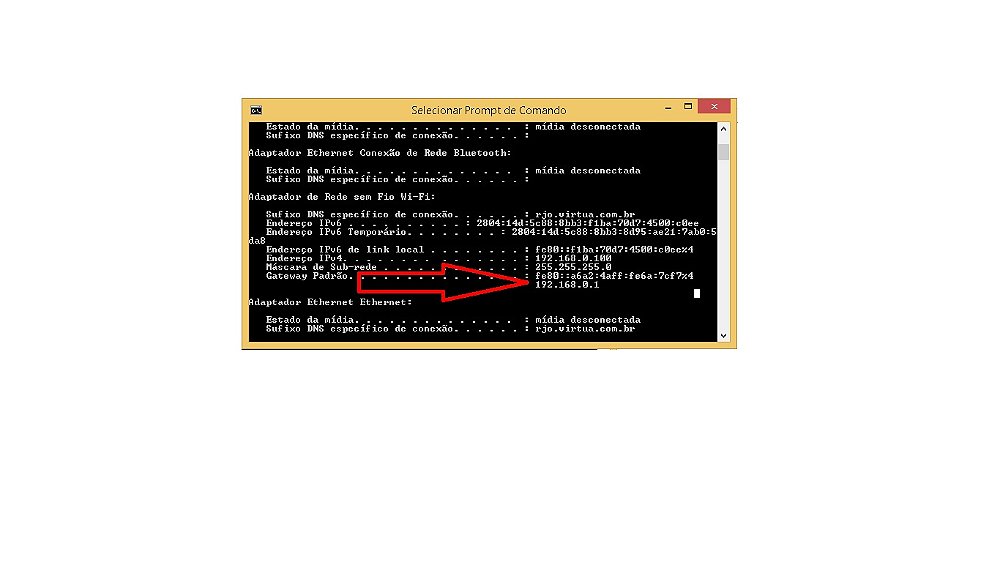
Para acessar seu roteador, o padrão é digitar 192.168.0.1 na barra de endereços do navegador(Chrome, Firefox, Internet Explorer, Edge, Safari, etc). Caso não abram as configurações de acesso do roteador, você deve abrir o prompt de comandos(CMD) e digitar “ipconfig”. Pronto, o endereço será exibido

Conexão Nula ou Limitada

Caso não tenha, tente “admin” para usuário e senha. Se não for essa a senha, veja no site do fabricante usuário e senha. Após ter acesso, procure pelo menu Radio Settings(Wireless Networwk) e modifique para o modo b/g/n

Se este conteúdo foi útil, e te ajudou a resolver o problema, contribua com qualquer valor para nos ajudar a manter o site.  Chave PIX: 21-981770244

Conexão Limitada Windows 8.1

Shopping Cart
Optimized by Optimole
Scroll to Top